It's time to provide the application with some structure. If we keep adding all the core functions of the application to the immediate function that bootstraps the app, it will very quickly grow out of control. In this section we create a HomeView object that encapsulates the logic to create and render the Home view.
Create a file named HomeView.js in the js directory, and define a HomeView constructor implemented as follows:
var HomeView = function (service) {

}
The constructor function takes the conference data service as an argument
HomeView uses a nested view to display the list of sessions. Defining the list of sessions as a separate view makes it reusable in other contexts. We will define SessionListView in Step 2 below. For now, define a local variable to keep track of the nested view.
var HomeView = function (service) {

    var sessionListView;

}
Define an initialize() function inside the HomeView constructor.
var HomeView = function (service) {

    var sessionListView;

    this.initialize = function () {
        // Define a div wrapper for the view (used to attach events)
        this.$el = $('<div/>');
        this.$el.on('keyup', '.search-key', this.findByName);
        sessionListView = new SessionListView();
        this.render();
    };

    this.initialize();
}
Move the renderHomeView() function from app.js to the HomeView class. To keep the view reusable, attach the HTML to the div wrapper (this.el) instead of the document body. Because the function is now encapsulated in HomeView, you can also rename it from renderHomeView() to just render().
this.render = function() {
    this.$el.html(this.template());
    $('.content', this.$el).html(sessionListView.$el);
    return this;
};
Move the findByName() function from app.js to HomeView and adjust it to work with the nested view.
this.findByName = function() {
    service.findByName($('.search-key').val()).done(function(sessions) {
        sessionListView.setSessions(sessions);
    });
};
Create a file named SessionListView.js in the js directory
Implement SessionListView as follows:
var SessionListView = function () {

    var sessions;

    this.initialize = function() {
        this.$el = $('<div/>');
        this.render();
    };

    this.setSessions = function(list) {
        sessions = list;
        this.render();
    }

    this.render = function() {
        this.$el.html(this.template(sessions));
        return this;
    };

    this.initialize();

}
In index.html, add script tags to include SessionListView.js and HomeView.js (just before the script tag for app.js):
<script src="js/SessionListView.js"></script>
<script src="js/HomeView.js"></script>
In app.js, remove the renderHomeView() function.
Remove the findByName() function.
Modify the templates initialization. Instead of declaring them as local variables, add them to the prototype of their respective classes:
HomeView.prototype.template = Handlebars.compile($("#home-tpl").html());
SessionListView.prototype.template =
            Handlebars.compile($("#session-list-tpl").html());
Modify the service initialization logic to display the Home View when the service has been successfully initialized. Pass the service as an argument to the Home View constructor.
service.initialize().done(function () {
    $('body').html(new HomeView(service).render().$el);
});
Test the application
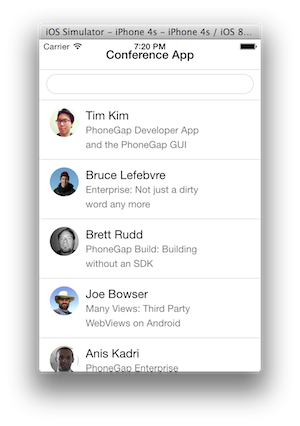
It should look exactly the same as it did in the previous module but the structure of how it all rendered is now different due to the view classes.