The final application source for the project we’ll be building in this workshop is located here.
If you haven’t done this prior to the workshop, download the zip file for the starter project or clone it with git:
$ git clone https://github.com/hollyschinsky/spotify-browser
There’s a solutions folder you can use as a reference for each module but try to go through and do each step yourself for a better learning experience. If you get stuck then you can simply replace your root project’s www and config.xml with those in the solutions folder from the module we’re working on.
Create a PhoneGap project using the PhoneGap CLI with the steps you learned in the beginner’s workshop. In this workshop we’re also
going to use the --template flag and tell PhoneGap to create our project based on a simple Framework7 template now available:
$ phonegap create spotifyApp --template phonegap-template-framework7
The above command will create a basic project with a default name and id. If you would like to specificallly set the name and id, use the following command to create your project with your desired parameters:
$ phonegap create spotifyApp --template phonegap-template-framework7 --name spotify-app --id com.mycompany.spotifyapp
You can view other template options using the
$ phonegap template listcommand.
First let’s test out the newly created app to ensure we see the basic template before moving on.
There are a couple of ways you can try it out throughout this workshop.
Open the www/index.html file in your browser directly.
Use the PhoneGap serve command to serve and try it on a device via the PhoneGap Developer App
Navigate into the newly created project folder
$ cd spotifyApp
Serve the app using the PhoneGap serve command
$ phonegap serve
Use the PhoneGap Developer app to connect to the ip address returned, or simply open it in your browser.
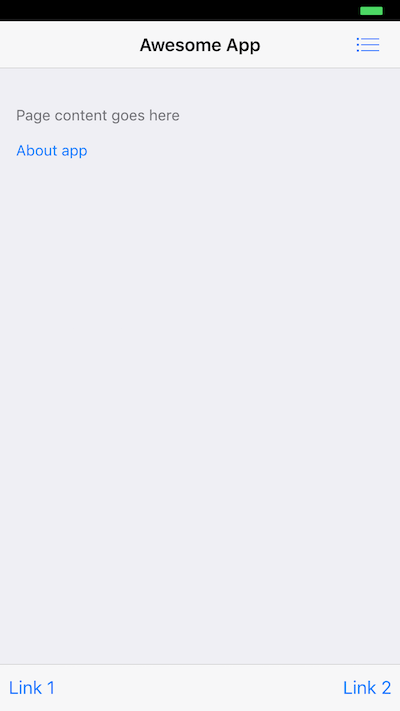
Ensure you see the application is shown and looks like what you see below:
Use the Chrome Developer tools at any time during this workshop to help debug any issues. Open it with Alt+Cmd+I or via the View->Developer menu.
Framework7 comes pre-defined with some basic icons but will support other icon libraries like [Font Awesome](http://fortawesome.github.io/Font-Awesome/ and Ionicons.
Locate the final project you downloaded and copy the www/lib/font-awesome folder into your www/lib folder.
Open index.html and add the reference to include the stylesheet link just before the styles.css stylesheet in the HTML header.
<link rel="stylesheet" href="lib/font-awesome/css/font-awesome.min.css">
To use Framework7 icons, specify the icon class first followed by the name of the icon definition (from the Framework7 CSS defintion):
<i class="icon icon-bars"></i>
To use the Font Awesome icons, specify the icon and fa class followed by the name of the icon you want to use. Find all the icons available
here.
<i class="icon fa fa-star"></i>
If you have any problems with setting up your project based on the above, remember you can simply copy over the files located in the solutions module1 starter folder into your project’s root (overwrite them) and start from there.
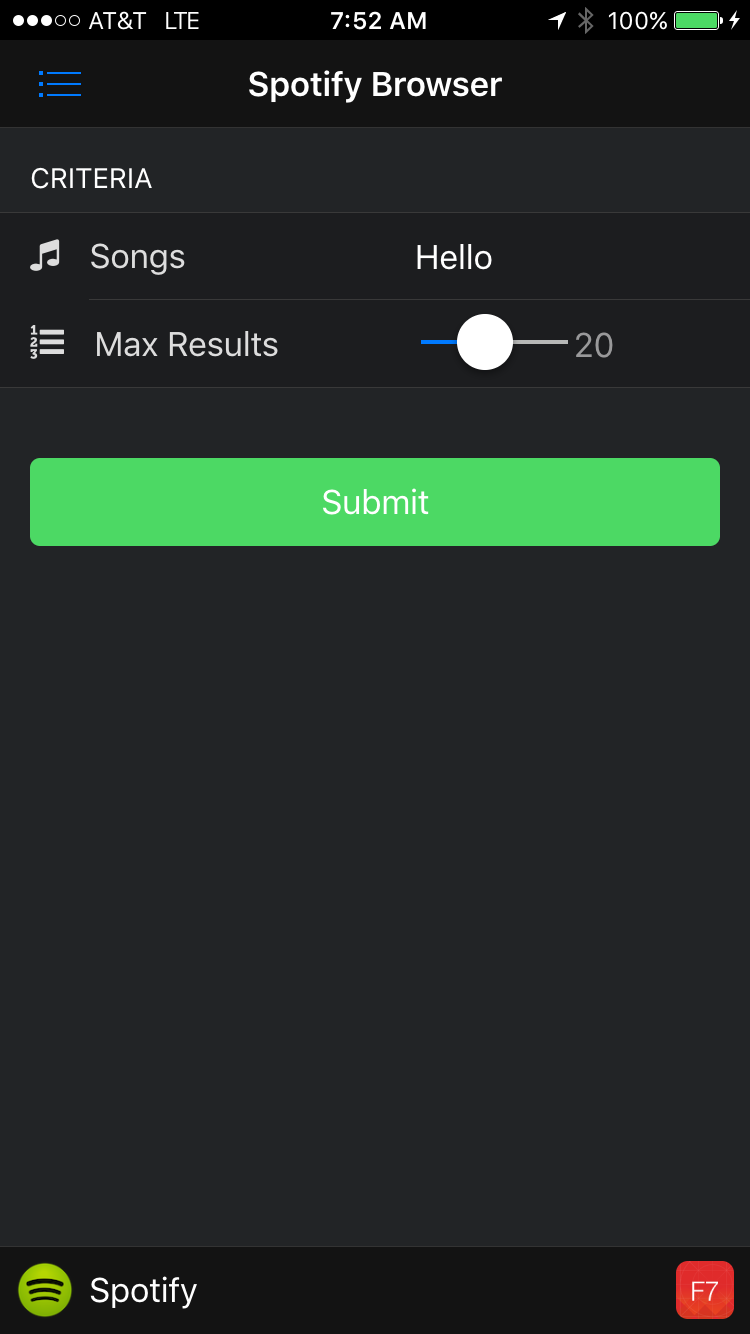
Try out the final app.
index.html in a browser to try it out. Some features that require native plugins will not work.Better yet, serve and pair with the PhoneGap Developer App from the PhoneGap CLI or PhoneGap Desktop:
$ phonegap serveserve command in the PhoneGap Developer app on a mobile device (or in a browser)Advanced Option: those with proper local setup can run on device/emulator with PhoneGap CLI with one of the following:
   $ phonegap run ios
   $ phonegap run ios --device
   $ phonegap run android
   $ phonegap run android --device
This option requires a mobile SDK setup. If you have Mac and Xcode you should be able to use iOS, but Android requires additional SDK installation and setup.
NOTE: If you don’t have the PhoneGap Developer App, you can still run the app in your browser by opening the index.html file in the browser, you will just have limited
functionality.
If you see an EADDRINUSE error then you ar still serving another project on the same port and need to stop it.
Ensure you see the application is shown and looks like what you see below: