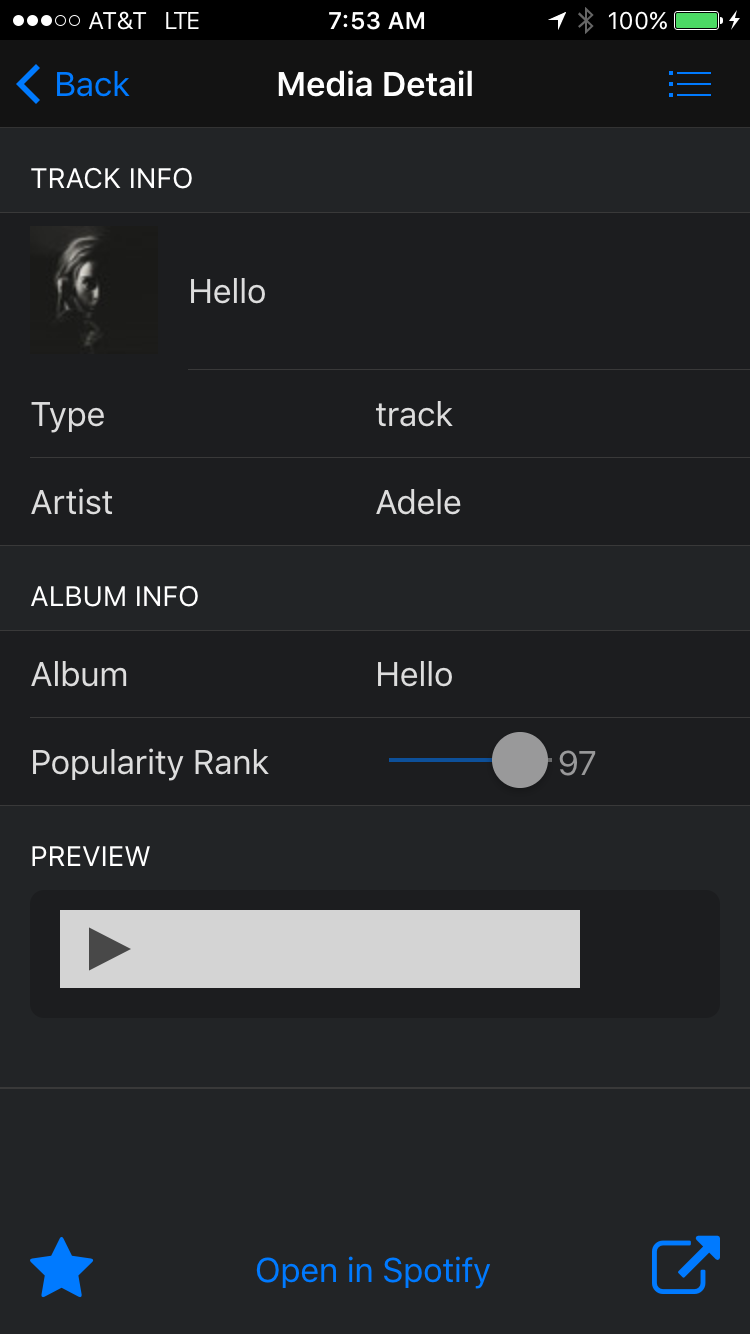
In this module you will add a template to display the details of a track selected from the list view. The new view is shown in the screenshot below.
Open index.html and add the following template for the media item detail after the list template created in the previous step.
 <script id="itemTemplate" type="text/template7">
     <div class="navbar">
         <div class="navbar-inner">
             <div class="left"><a href="#" class="back link"> <i class="icon icon-back"></i><span>Back</span></a></div>
             <div class="center sliding">Media Detail</div>
             <div class="right">
                 <a href="#" class="link icon-only open-panel"> <i class="icon icon-bars"></i></a>
             </div>
         </div>
     </div>

     <div data-page="media" class="page no-toolbar">
         <div class="page-content">
             <div class="content-block-title">Track Info</div>
             <div class="list-block">
                 <ul>
                     <li>
                         <div class="item-content">
                             <div class="item-media"><img data-src="" class="lazy"/></div>
                             <div class="item-inner">
                                 <div class="item-title"></div>
                             </div>
                         </div>
                         <div class="item-content">
                             <div class="item-inner">
                                 <div class="item-title label">Type</div>
                                 <div class="item-title label"></div>
                             </div>
                         </div>
                     </li>

                     <li>
                         <div class="item-content">
                             <div class="item-inner">
                                 <div class="item-title label">Artist</div>
                                 <div class="item-title label"></div>
                             </div>
                         </div>
                     </li>
                 </ul>
             </div>
             <div class="content-block-title">Album Info</div>
             <div class="list-block">
                 <ul>
                     <li>
                         <div class="item-content">
                             <div class="item-inner">
                                 <div class="item-title label">Album</div>
                                 <div class="item-title label"></div>
                             </div>
                         </div>
                     </li>

                     <li>
                         <div class="item-content">
                             <div class="item-inner">
                                 <div class="item-title label">Popularity Rank</div>
                                 <div class="item-input">
                                     <div class="range-slider">
                                         <input type="range" min="0" max="100" value="" disabled/>
                                     </div>
                                 </div>
                                 <div class="item-input rangeVal">
                                     <input type="text" disabled value="">
                                 </div>
                             </div>
                         </div>
                     </li>
                 </ul>
             </div>

             <div class="content-block-title">Preview</div>
             <div class="content-block inset">
                 <div class="content-block-inner">
                     <div id="previewAudio">
                         <audio controls preload src=""></audio>
                     </div>
                 </div>
             </div>

             <div class="list-block">
                 <ul>
                     <li>
                         <div class="item-content bottom">
                             <div class="item-inner">
                                 <a href="#" class="item-media link favorite"><i class="icon fa fa-star fa-2x"></i> </a>
                                 <div class="item-title">
                                     <a href="" class="link external"> Open in Spotify</a>
                                 </div>
                                 <a href="#" class="share item-media link"><i class="icon fa fa-external-link fa-2x"></i></a>
                             </div>
                         </div>
                     </li>
                 </ul>
             </div>
         </div>
     </div>
 </script>
Now that we have our new item template, we need to use it. We want to display this view when a list item is clicked on, so we’ll revisit the list template to locate the specific link element for an item. The original link looks like this:
<a href='#' class="item-content item-link">
We can add the data-template and data-context attributes to it to specify a template to load and the data to bind to it, similar to how we
told the router this information via JavaScript for the list view. (See this link
for data-template and data-context info).
Specify the name of the template itemTemplate and use {{this}} as the expression to bind to for the data, since it refers to the current
data item. See this link for more details on other variables and syntax you can use in Template7.
<a href='#' class="item-content item-link" data-template='itemTemplate' data-context="{{this}}">
There’s one more thing we need to do before this will all work properly, and that is to properly format our data using a template helper.
The data being passed in the data-context attribute above is currently a JavaScript object since we iterated through an Array of objects
to build the list, and we’re referencing the current context of this which is just a singular object from that Array.
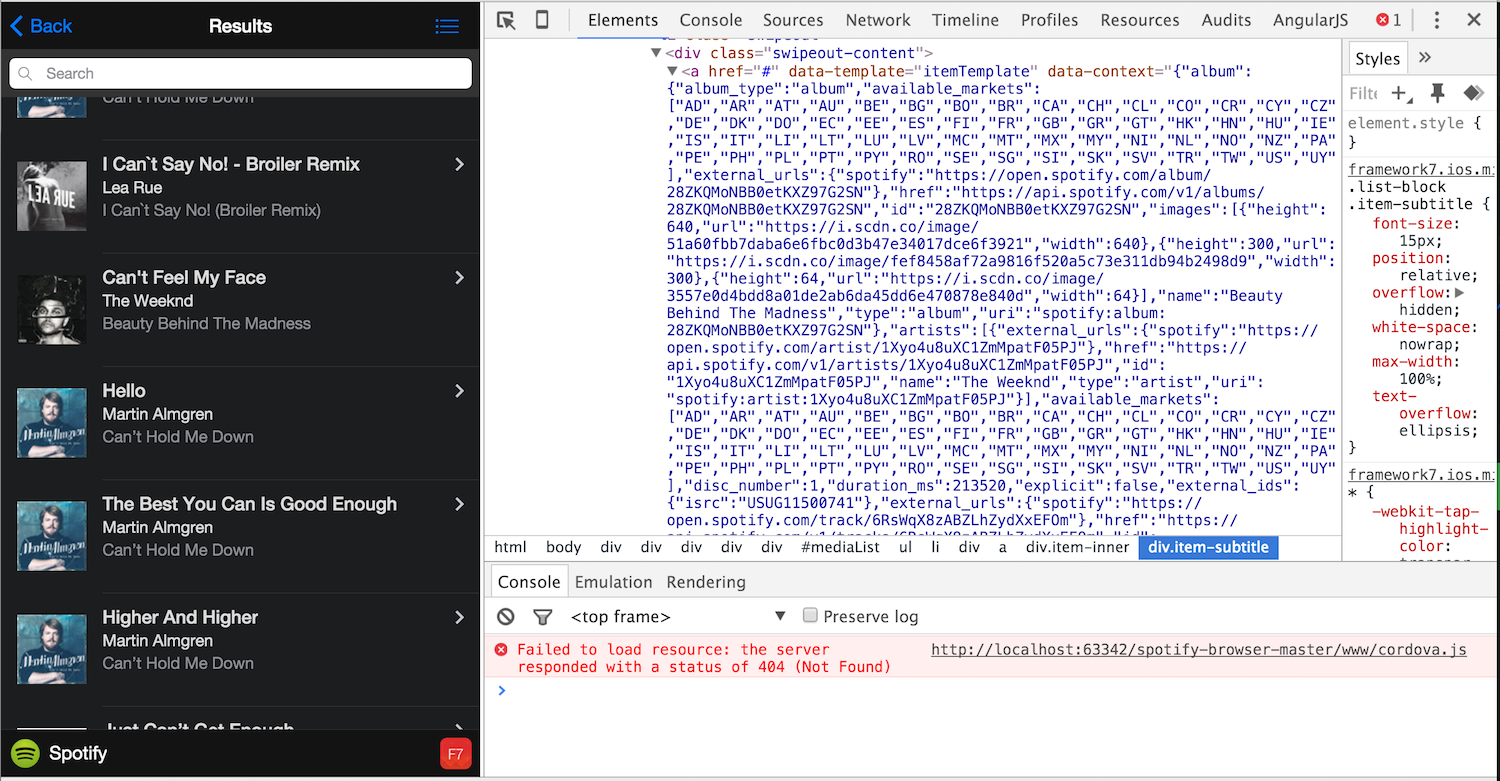
<a href="#" data-template="itemTemplate" data-context="[object Object]" class="item-content item-link">
It will try to bind expressions literally from the string [object Object] and will fail with an Uncaught SyntaxError: Unexpected token o
like shown below:

Instead, we need to use the JSON stringify method to convert it to valid JSON. We can define something called a helper to fix this issue. A helper is a function that is called before the data is bound to the template to pre-process it. There are pre-defined ones or you can define your own. See this link for more information on the syntax.
Before we move on, we should add one more formatting detail into our stringify helper. Sometimes the wrong type of apostrophe is returned
and it will cause an error depending on what you searched. We can use regex to do a replace on any of these invalid apostrophe’s
and set it to the standard HTML apostrophe (') to fix it.
Important: Template helpers need to be defined before the app is initialized, so be sure to add this to the top of the my-app.js
file.
 Template7.registerHelper('stringify', function (context){
     var str = JSON.stringify(context);
     return str.replace(/'/g, ''');
 });
Open the index.html file and apply the stringify helper to the data-context object (this) being passed in:
<a href="#" class="item-content item-link" data-template="itemTemplate" data-context="{{stringify this}}">
If you inspect the list page in the chrome dev tools you’ll see the JSON data displayed as the value of the data-context attribute.
Now run your app and ensure you can navigate into this new detail view when a list item is clicked.
If you haven’t already tried clicking on the Preview button to ensure you hear audio playing.
You may notice some of the formatting of the controls and the app could be cleaned up a bit. If you want to fix it, there are some styles
set up in the final project www/css/styles.css you can copy into yours now to make it more presentable.