In this step we’ll add some common mobile UX features to our app to make it more useful; menus (aka side-drawer navigation) and swipeouts.
The decision to use a slide-out menu (also known as a navigation drawer or hamburger menu) is widely debated, but it has been a common mobile pattern in the recent past. It might be best used for less commonly used actions where you don’t want to use important screen real estate.

Let’s look at how Framework7 supports panels to create a side panel menu with some basic event handling. Since we started with a basic Framework7 template initially, we already have some placeholder code for a panel.
Open index.html and locate the <div class="panel-overlay"></div> section. Currently there’s a left panel already defined with a simple
element in it that we can replace with our menu list. Modify the existing panel code to define the following content menu list:
 <div class="panel-overlay"></div>
 <!-- Left panel with reveal effect-->
 <div class="panel panel-left panel-reveal">
     <div class="list-block">
         <ul>
             <li id="settings">
                 <div class="item-content">
                     <div class="item-media"> <i class="icon fa fa-cog"></i></div>
                     <div class="item-inner">
                         <div class="item-title label">Settings</div>
                     </div>
                 </div>
             </li>
             <li id="favorites" >
                 <div class="item-content">
                     <div class="item-media"><i class="icon fa fa-star"></i></div>
                     <div class="item-inner">
                         <div class="item-title label">Favorites</div>
                     </div>
                 </div>
             </li>
             <li id="about">
                 <div class="item-content">
                     <div class="item-media"><i class="icon fa fa-info-circle"></i></div>
                     <div class="item-inner">
                         <div class="item-title label">About</div>
                     </div>
                 </div>
             </li>
         </ul>
     </div>
 </div>
Notice the panel has a
revealeffect. You could change it topanel-coverto try out that effect instead.
Now we need to add handling for each of these menu list items. Each of them has an id we can use to add a click event to.
Open my-app.js and add the following basic click handlers to the end of the file for each of the id’s:
 $$(document).on('click', '#favorites', function (e) {
     myApp.alert('Show my favorites');
 });

 $$(document).on('click', '#about', function (e) {
     myApp.alert('Show About');
 });

 $$(document).on('click', '#settings', function (e) {
     myApp.alert('Show Settings');
 });
Extra credit: Add a template to handle the About page that is loaded when the menu item is clicked. (Use the Framework7 docs as a reference).
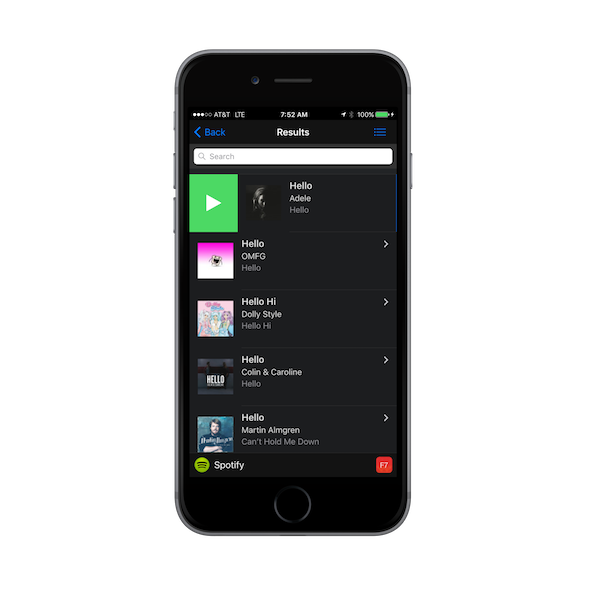
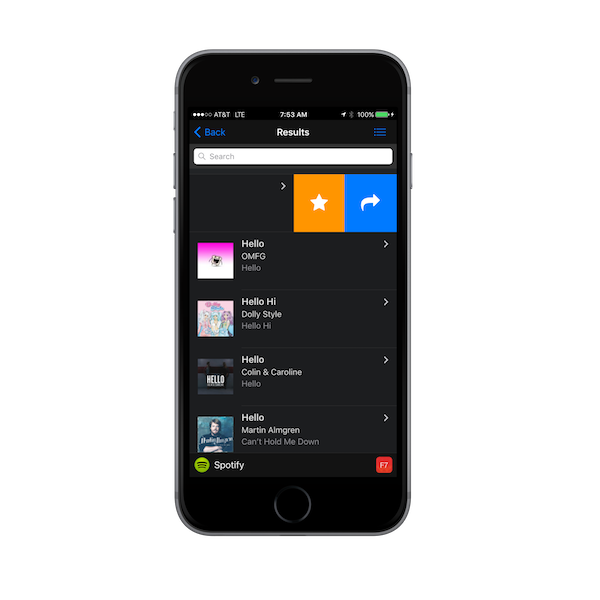
Now let’s look at how we can use swipeout handling with Framework7. Swipeouts are a common pattern that allow a user to swipe left or right to uncover further actions to take on a list item. Notice the colored buttons shown on the list items below.
The iOS Reminders app is another good example of using swipeouts:

Open index.html, locate the list template definition and take a look at the parts with swipeout related classes.
     <li class="swipeout">
        <div class="swipeout-content">
            <a href='#' id='mediaItem{{@index}}' data-template='itemTemplate' data-context='{{stringify this}}'
               class="item-content item-link">
                <div class="item-media">
                    <img data-src="{{album.images[2].url}}" class="lazy">
                </div>
                <div class="item-inner">
                    <div class="item-title-row">
                        <div class="item-title">{{name}}</div>
                    </div>
                    <div class="item-subtitle">{{artists[0].name}}</div>
                    <div class="item-text">{{album.name}}</div>
                </div>
            </a>
        </div>
        <div class="swipeout-actions-right">
            <a href="#" class="bg-orange favorite" data-item="{{@index}}"><i class="icon fa fa-star fa-2x"></i></a>
            <a href="#" class="bg-blue share" data-item="{{@index}}"><i class="icon fa fa-share fa-2x"></i></a>
        </div>
        <div class="swipeout-actions-left">
            <a href="#" class="bg-green preview" data-item="{{@index}}"><i class="icon fa fa-play fa-2x"></i></a>
        </div>
    </li>
In the above definition we have buttons in the swipeout-actions-right and swipeout-actions-left that require some handlers to invoke code to actually do something when clicked. In this
step we will add the handling for them.
The
data-item="{{@index}}"syntax will pass the index of the item clicked on so we can then reference the right item in the code.
Add a Page Init handler to use for setting up events we want to handle on the list page specifically.
 myApp.onPageInit('list', function (page) {

 });'
Add Favorites Handler - the star button indicates that the user can add this item as a favorite. Open my-app.js and add the following into the list page
init handler created in the previous step myApp.onPageInit('list', function (page) {...
 $$(page.container).find('.favorite').on('click', function (e) {
     var item = page.context[this.dataset.item]; //this.dataset.item returns data held in data-item attribute set in template
     myApp.alert(item.name + ' added to favorites!');
 });
Note the use of the
page.context[this.dataset.item];As mentioned above, we passed the index of the current item clicked on thedata-itemattribute. Here we use it to retrieve that index from the page context. The page context is the array of results we received and supplied for the list template.
Add Preview Handler - the left swipeout play button indicates the user can click it to play a preview of this item. Openmy-app.js and add the following into
the list page init handler as well:
 $$(page.container).find('.preview').on('click', function (e) {
     var item = page.context[this.dataset.item]; //this.dataset.item returns data held in data-item attribute set in template

     myApp.alert("Previewing " + item.name);
     var media = new Media(item.preview_url, function () {console.log("Media Success");},function (error)
         {console.log("Media fail " + error)},null);
     media.play();
     setTimeout(function() {media.stop()},7000) //preview for 7 seconds
 });
The preview feature above requires the Media Plugin. If you’re testing with the PhoneGap Developer app on your mobile device, then it’s already configured for you in the sandboxed environment. If you’re running locally with the CLI however, be sure to add the plugin.
$ phonegap plugin add cordova-plugin-media --save
This command will also add the Cordova File Plugin by default since it’s a required dependency.
You may notice there’s also a Share swipeout button but we will be handling that in a later module since it requires a 3rd party plugin.
Run the app to make sure you see the click events firing when you tap on the Preview and Favorites buttons in the swipeouts.
Based on the F7 docs, the swipeout support will not work well in the browser so you should test this feature via the PhoneGap Developer App or the CLI locally.